Ultra Wap Power Over Ethernet modification.
Thiss page details how to make a very simple modification to the UltraWap access point, so that it has internal Power Over Ethernet (POE). The end result is that power to the unit is fed up the ethernet cable. Good news is that you run very long lengths of cat5 cable carrying POE to an Ultra WAP because the unit quite happily operates at voltages well below it's rated 12 Volt input. I have tested it down to five volts, and it works just fine. Even better, I have also accidentally reverse polarised the unit, and it wasn't damaged - the thing is idiot proof!!
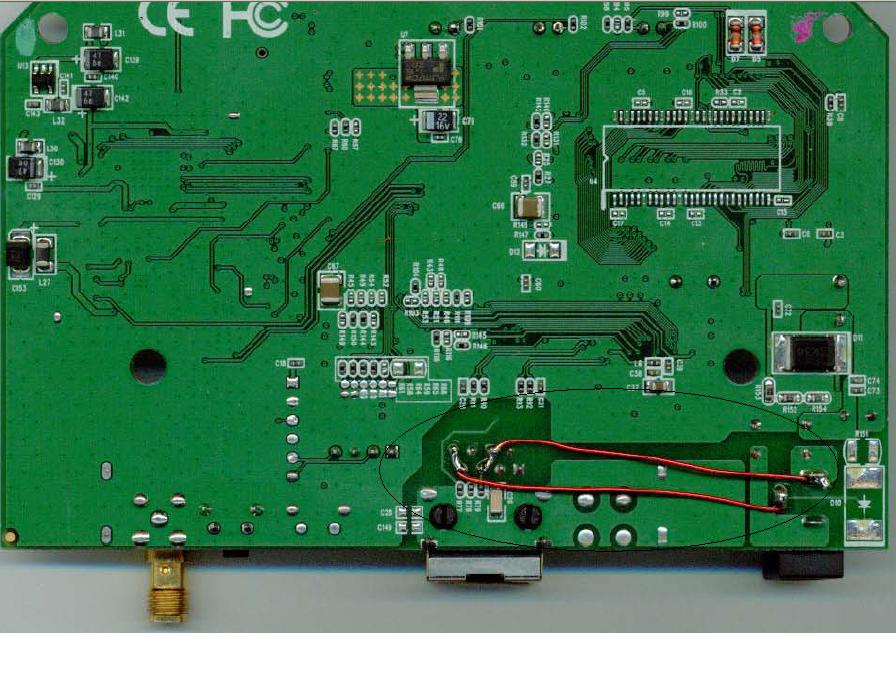
After you have completed this modification, pins 4&5 (Blue/Bluewhite) are positive, and pins 7&8 (Brownwhite/Brown) are ground. There is actually no colouring standard for DC Power Over Ethernet that I am aware of, however everyone that I know uses BLUE pair positive, and BROWN pair ground. You will also need some enamelled copper wire. I chose this because of it's low profile, and it's much easier to work with in this situation than ordinary insulated copper wire. Enamelled copper wire is available from the likes of Dick Smith Electronics or Jaycar Electronics etc etc. When soldering the ends of enamelled copper wire you must first tin each end with a very hot soldering iron in order to burn off the enamel at the ends. It's very easy, and takes less time than does stripping wire. If you can't be bothered going to the electronics shop to purchase the enamelled copper wire, you can use some of the conductor wire from inside a CAT5 or CAT6 cable, however this will be a bit fiddly and won't look half as good when you are finished. Of course to make this modification work, you will need to put power on it at the other end. One way to do this is to simply purchase a POE injector kit from http://www.wifitech.com.au/- the Ultra-Wap's plug pack plugs straight in to these. Another way is to separate the blue and brown pairs out of one end of your ethernet cable, and connect them to the UltraWap's plug pack using solder. This is easy and free :) 1. Remove the four screws from the bottom of the case 2. Remove the UltraWAP PCB from the case, exposing it's under side 3. Using Enameled copper wire* solder two links underneath the PCB as shown below. These links are between the ethernet jack and the power socket on the PCB. 4. Fit the Ultra Wap back inside it's case, and you have completed the Ultra Wap Power Over Ethernet modification. |